
Oxygen Sensor Replacement Is an Intermediate Job for Most DIYers. Here’s Everything You Need to Know to Replace an O2 Sensor at Home.
- DIY Difficulty Level: Intermediate, could be easier or harder depending on the vehicle
- Time Required: 1 to 2 hours
- Tools & Materials:
- New oxygen sensor
- Wrenches and sockets
- Oxygen sensor socket (if your sensor is hard to reach with a wrench)
What Is an Oxygen Sensor?
The oxygen sensor (commonly referred to as an “O2 sensor”) monitors how much unburned oxygen is in the exhaust as the exhaust exits the engine of your vehicle.
Typically, there are one or two sensors in front of your catalytic converter and one behind it. Comparing data from before and after the catalytic converter also tells the computer how well it is working and if there are any problems with your emission system as well.
By monitoring oxygen levels and sending this information to your engine’s computer, these sensors let your car know if the fuel mix is running rich (not enough oxygen) or lean (too much oxygen). Proper air-fuel ratio is critical to keeping your car running as smoothly as it should be.
Be sure to read our in-depth guide to oxygen sensors for more information.
Is It Safe to Drive with a Bad Oxygen Sensor?
When an oxygen sensor fails, there are a variety of diagnostic trouble codes (DTCs) that can pop up. Most of the time, a faulty oxygen sensor will result in a check engine light accompanied with a fault code that you can read with an OBD2 scanner like FIXD. Based on this fault code, it will point to how it failed and then move forward with the diagnosis.
Continuing to drive with a faulty oxygen sensor can cause the engine to run rough, and potentially cause a lack of power or even engine damage. The check engine light being on will also cause you to fail an emissions test if you live in an area that includes them in car inspections.
Whether it’s worth replacing an oxygen sensor yourself or paying a shop to do it depends on how difficult it is to access the sensor. My van’s sensors are easy to reach from inside with the “doghouse” over the back of the engine removed, so it’s a no-brainer to replace it myself. On other cars, the sensor may be crammed between the top of the exhaust pipe and the floor of the car, and/or require a significant dismantling of your exhaust system to reach. If it’s too difficult for you, take it to the shop.
When to Replace an Oxygen Sensor
The oxygen sensor is not a routine maintenance item. They do fail from time to time, though, triggering a check engine light. Use an OBD2 scanner like FIXD to determine the cause of the check engine light. If the trouble code indicates bad data from an oxygen sensor, it’s time to replace it. Unlike other items, you don’t need to replace all of the oxygen sensors at the same time when one fails.
What Are Common Symptoms Indicating You Need to Replace an Oxygen Sensor?
Symptoms of a faulty O2 sensor may include the following:
- Check engine light, often a P0420 code
- Lean or rich running condition
- Poor acceleration
- Engine hesitation
- Black smoke from tailpipe (rich running condition) black smoke is excess fuel exiting the exhaust
- Rough idle
- Vehicle stalling out
- Reduced fuel efficiency
Keep in Mind
Just because the trouble code(s) you scanned indicate a problem with the oxygen sensor doesn’t mean the sensor itself is automatically bad. It might operating correctly and simply doing its job of telling you something is wrong in another part of your engine. For example, a Ford technical service bulletin says that for several codes associated with the oxygen sensor, the first thing you should check is the PCV valve, not the sensor. Research your particular make and model, cross reference any codes you get, and make sure a bad sensor is actually the problem before replacing it.
If in doubt, it’s certainly worth taking your car to a shop for a professional diagnosis. They have the tools and knowledge to determine whether your sensor is bad or if something else is wrong with your car.
How It’s Done
Step 1: Diagnose the bad oxygen sensor

Your car has at least two oxygen sensors, possibly more depending on your engine. Use the Live Gauges feature of FIXD to watch the data coming in from your sensors in real-time. In this example, sensor 1 is fluctuating normally as it should, but sensor 2 appears to be stuck at 0 volts. This would indicate that the issue exists with sensor 2. For a detailed description of the diagnosis process, read our article all about oxygen sensors.
Again, research your particular vehicle, and make sure there isn’t another problem that the sensor is correctly indicating, rather than assuming the sensor itself is bad. If everything else is fine and you are confident that the sensor is bad, then replace it.
Step 2: Unplug the sensor
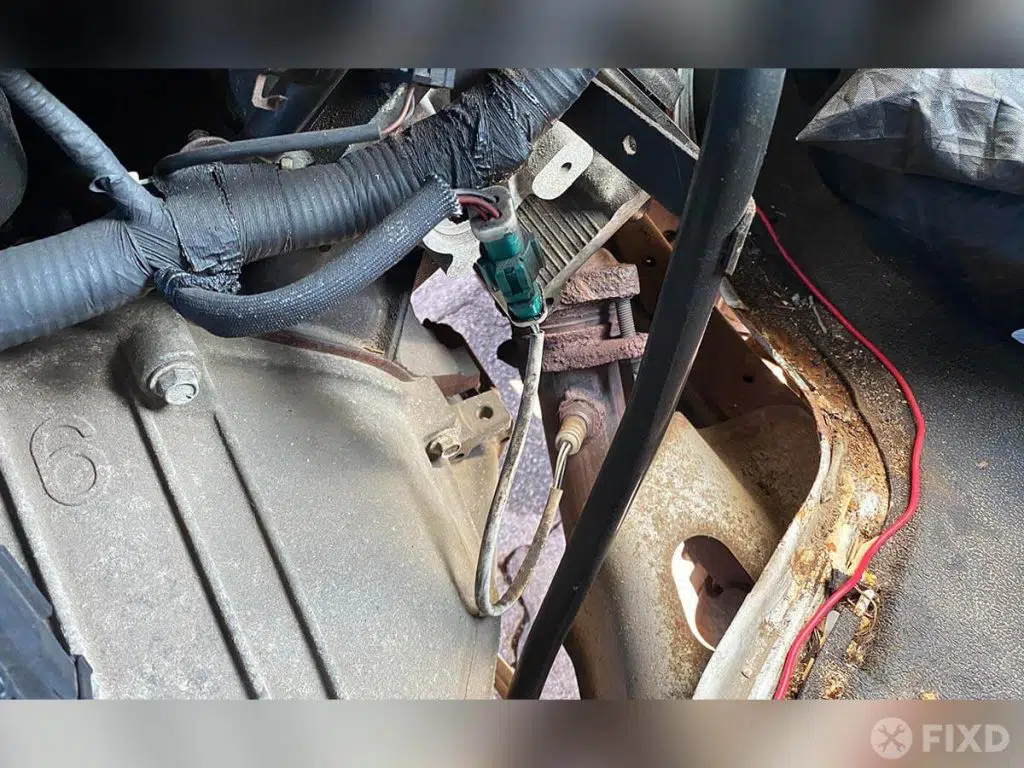
Unplug the oxygen sensor from its wiring harness. This will allow it to turn freely when you remove it from the exhaust pipe.
Step 3: Lubricate the threads
The oxygen sensor screws into your exhaust pipe just like a screw or a spark plug. Numerous cycles of heating up and cooling down cause the metal to expand and contract, which could make the sensor fit tightly. This area is also prone to rust, making matters worse. Spray the area with penetrating oil like WD40 or PB Blaster, then let it sit for a while. This will make removing it easier.
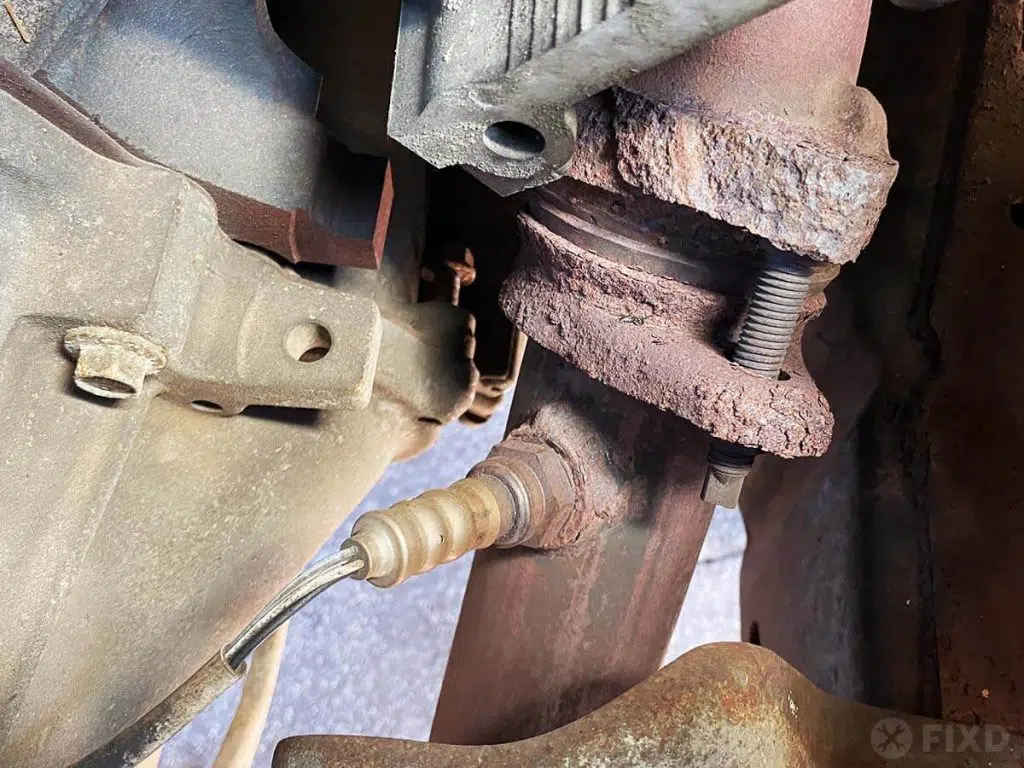
Step 4: Remove the sensor
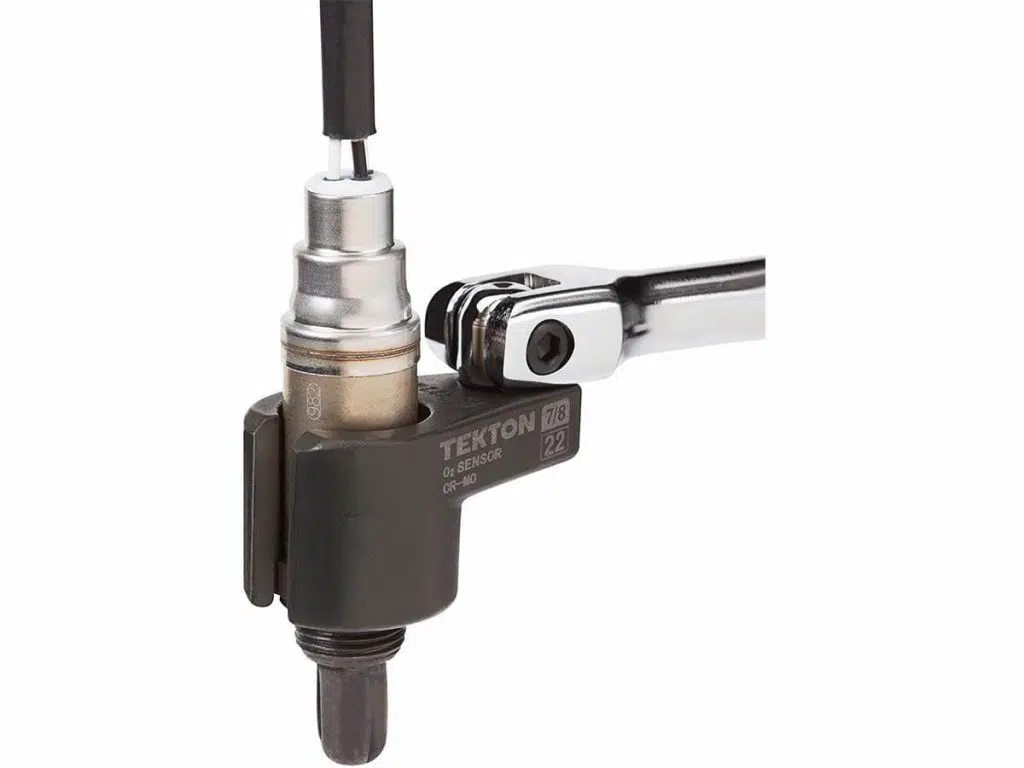
If you have the space, as shown above, you can use an open-end wrench to remove it. In tight quarters, you might need to use an oxygen sensor socket. This is a special socket with a slot to put the wire through so you can slide it down over the sensor. Your socket wrench or extension attaches to an offset flange to give you better leverage on it. Do what it takes to get the old sensor out.
Step 5: Install the new sensor
As the repair manuals say, installation is the opposite of removal. Screw the new sensor tightly into the exhaust pipe, then plug it into the wiring harness.
Step 6: Clear your codes
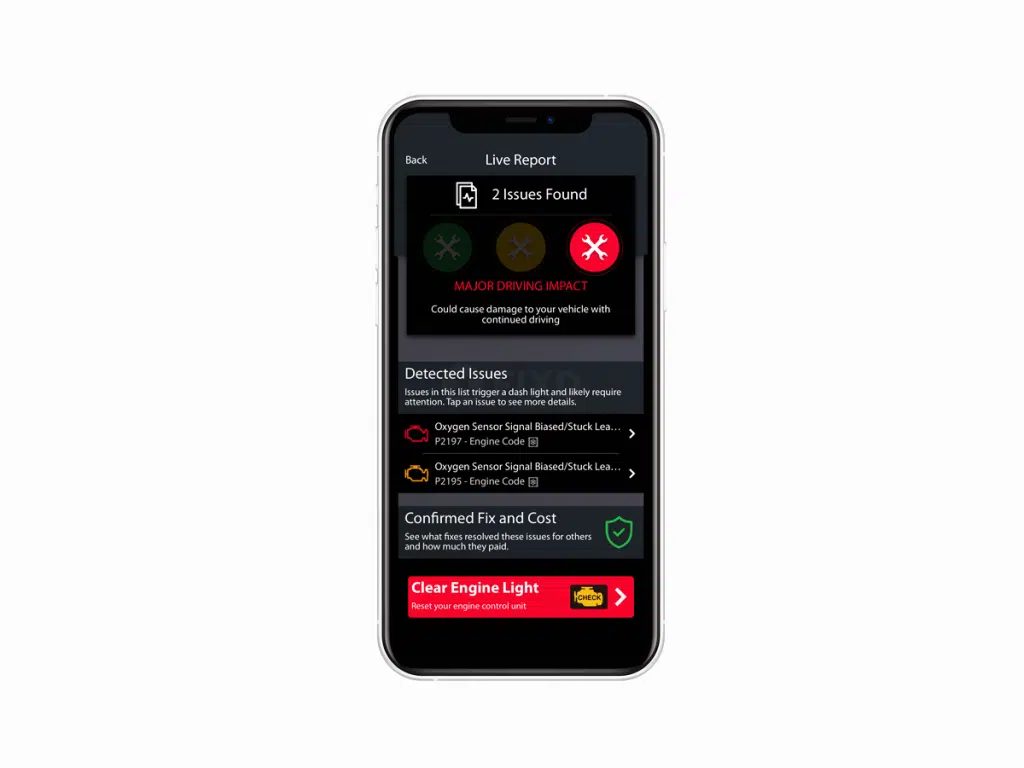
Using FIXD, scan your trouble codes again, then click the Clear Engine Light button at the bottom of the screen. This will clear all of the codes and turn off your check engine light.
Step 7: Go for a drive
As you continue to drive, your check engine light should remain off, indicating that the problem is fixed. If the light turns back on, the sensor you replaced was not the problem after all. Use FIXD to read the codes and continue diagnosing the problem.
Claim Your Custom Maintenance Schedule
Get the FIXD Sensor and free app today for a custom maintenance schedule based on your make, model, and mileage. Never miss important maintenance again with automated maintenance alerts! Learn more at fixdapp.com.

Recovering autocross and track day enthusiast. Once turned a VW Jetta into a pickup truck. Lives in a van down by the river. Dream car: 2001 Subaru WRC rally car.