Replacing Your Car’s Disc Brake Components is a Beginner-Level Repair for DIYers. Here’s Everything You Need to Know to Replace Brake Pads and Rotors In Less Than An Hour.
- DIY Difficulty Level: Beginner
- Time Required: 1 hour
- Tools & Materials: Various wrenches, ratchets, and sockets depending on your particular vehicle
What Are Pads and Rotors?
The term “pads and rotors” is used for vehicles equipped with disc brakes, while “drums and shoes” is used for the components of drum brakes. Most modern vehicles are equipped with four-wheel disc brakes, which means there are pads and rotors at each wheel. Front brake pads usually wear faster than rear brake pads, so they don’t always have to be replaced at the same time. Some modern vehicles still have front disc brakes and drum rear brakes.
When you press the brake pedal, fluid in the master cylinder applies pressure to the brake calipers, which in turn squeezes the brake pads against the brake rotors. This friction is what stops your car. Over time, the material used for the brake pads and rotors wears out, and this wear is determined by factors that include the weight of your vehicle, road conditions (flat vs. hilly), your driving style, if you use the vehicle for towing, and more. Bottom line, the harder you are on your brakes, the sooner they will wear out.
Performing regular preventive maintenance such as the replacement of a serpentine belt will help keep your car running and on the road… even for a million miles! And if you’re buying a used car, doing a quick inspection of the brake pads and rotors is just one way to gauge how well the vehicle was maintained.
Phenolic vs Steel Caliper Pistons

Brake pads attach to the brake caliper pistons using metal clips, but there are two materials used for the pistons: phenolic and steel. Knowing the difference is important to prevent costly damage while replacing the brake pads. You’ll want to know which type of piston your caliper has before buying pads as the clips that attach the pads to the caliper pistons are different.
Steel caliper pistons are more durable, but they transfer more heat to the brake fluid, which can negatively affect braking performance. Phenolic pistons reduce heat transfer, but they are more susceptible to damage while compressing the piston to install new pads. Steel pistons have a smooth finish, while phenolic pistons look more like a brake pad material.
Important Tip: Never use channel locks or pliers to directly compress the piston as this could damage the piston and result in costly repairs. Only use proper tools when compressing the caliper pistons.
Is It Safe to Drive with Worn Pads and Rotors?
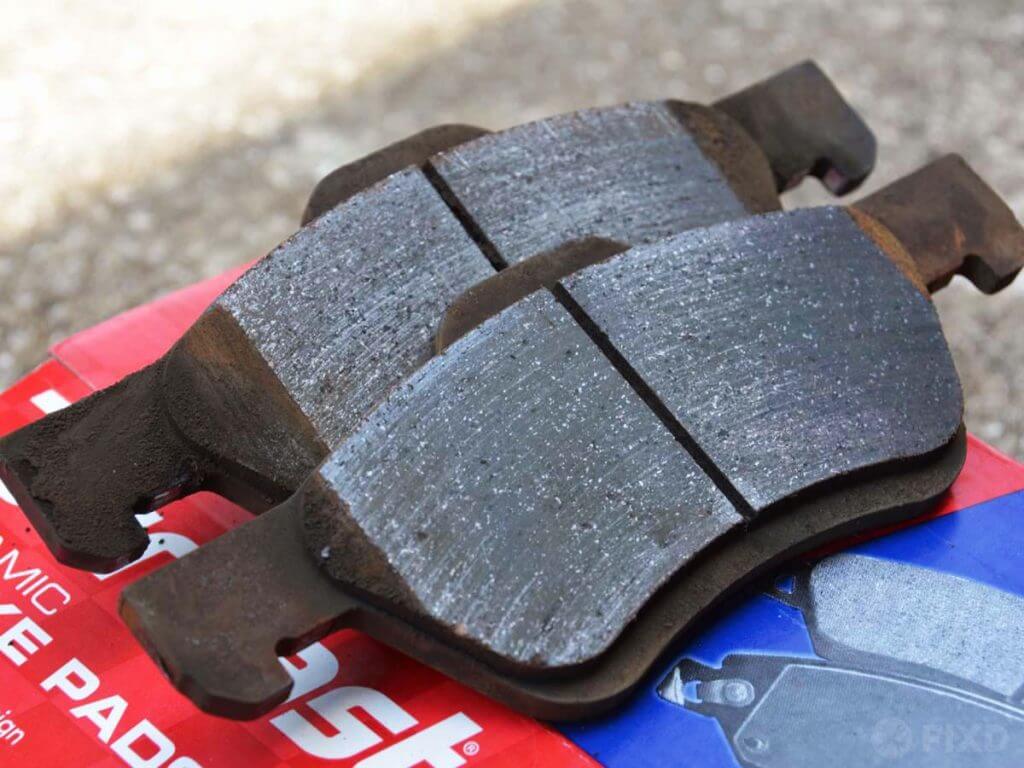
The lifespan of brake pads is measured in millimeters, and once you get to about 3 mm in thickness, you should start thinking about replacing the brake pads. Not only is it unsafe to drive with brake pads that are too thin, doing so could cause unnecessary damage to other brake system components such as the rotors and calipers.
What happens if I don’t do this? How bad could things get?
If you don’t replace the brake pads before they get to their minimum thickness, it will cost you more in the long run. Generally speaking, brake rotors should be able to outlive at least two or three sets of brake pads before requiring replacement, but driving with pads that are too worn out could cause damage to the rotors, which are more expensive to replace than pads. Worst case scenario, if the pads and/or rotors fail, the braking system won’t be able to stop your car properly.
In short, why is this job important?
Keeping your vehicle’s braking system properly maintained is important to ensure a safe-driving vehicle. Additionally, preventative maintenance such as replacing almost-worn-out brake pads helps to save you money in the long run compared to waiting until the pads are worn out and affect the condition of the rotors.
The average cost to replace brake pads is between $230 and $274 including labor, while the average cost to replace brake rotors is between $304 and $404. That means a full, four-wheel disc brake job with new pads and rotors could cost you between $534 and $678 at a repair shop. Considering this is a beginner-level repair, replacing the brake pads and rotors is easy even for novices, and doing it yourself will save you upwards of $200 in labor costs!
When to Replace Pads and Rotors?
How often should you replace this part?
The life of your brake pads and rotors directly correlates to how and where you drive your vehicle, but generally speaking, brake pads tend to last at least 30,000 miles. If you drive carefully and keep up on maintenance, the brake rotors should survive at least two sets of brake pads before requiring replacement; in some cases, the rotors will need to be machined but not replaced.
How do you know when it’s time to have this done or do it yourself?
If you hear a squealing noise from your brakes when you press the brake pedal, chances are that the noise is coming from the wear indicator, which is telling you to replace your brake pads now. This noise isn’t harmful to your brakes, but that doesn’t mean you should put off replacing the brake pads.
What Are Common Symptoms Indicating You Need New Brake Pads and/or Brake Rotors?
What symptoms should you look/listen/check for?
- Squealing or grinding noise when you press the brake pedal
- Vibration (felt in the pedal or steering wheel) when you press the brake pedal
- Mileage determined by manufacturer’s preventative maintenance schedule
- Visual inspection shows worn brake pads (if the pads look damaged or are less than 3 mm in thickness)
How To Replace Brake Pads and Rotors
Step 1: Safely jack up vehicle and remove wheels and tires
Just as you would for a tire rotation, start by jacking up the vehicle on a level surface and place jack stands in a safe location to support the vehicle. Regardless of whether you’re replacing the front or rear brakes, you should try to only do one axle at a time and be sure to use a tire chock in front of and behind the tires that remain on the ground.
Step 2: Uninstall the calipers
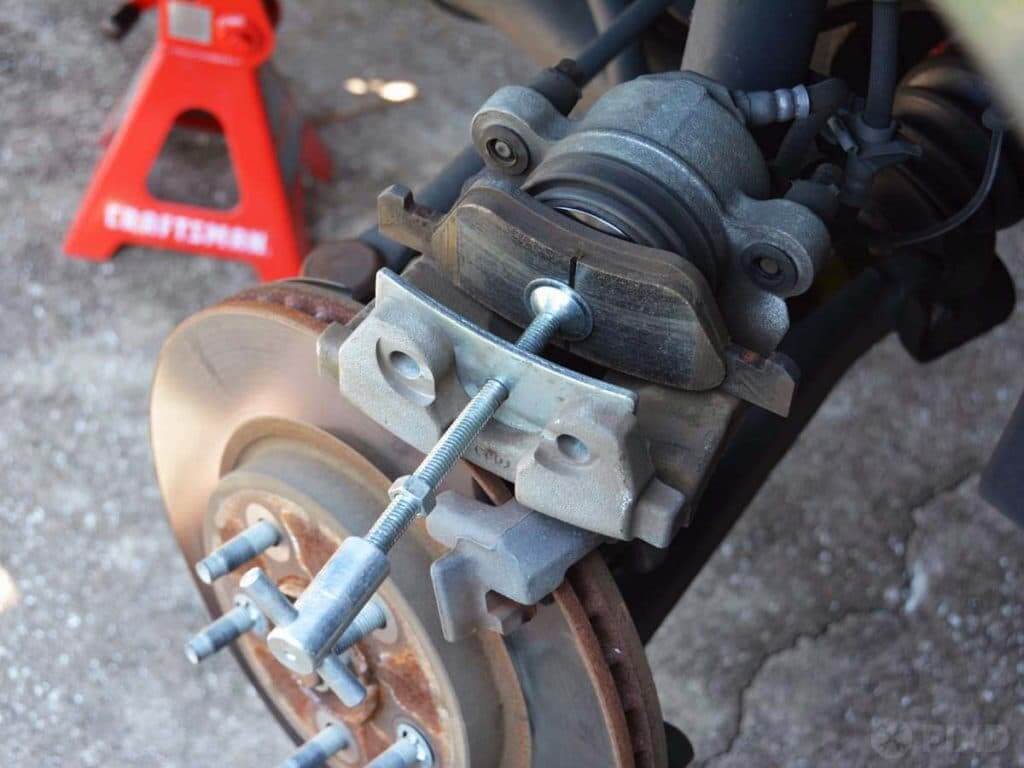
Before removing the pads from the calipers, use a caliper compression tool (or a large pair of pliers) to squeeze the caliper piston(s) back. Do not squeeze against the caliper piston directly or you could damage the piston. Once the piston has been compressed, then you can remove the brake pads.
If you’re also replacing the rotors or some other reason for not reinstalling the calipers right away, be sure not to let the caliper hang from the brake hose; rest the caliper on top of the brake rotor (as shown below) or use a metal coat hanger or wire to hang the caliper to a nearby area such as the frame or coil spring.

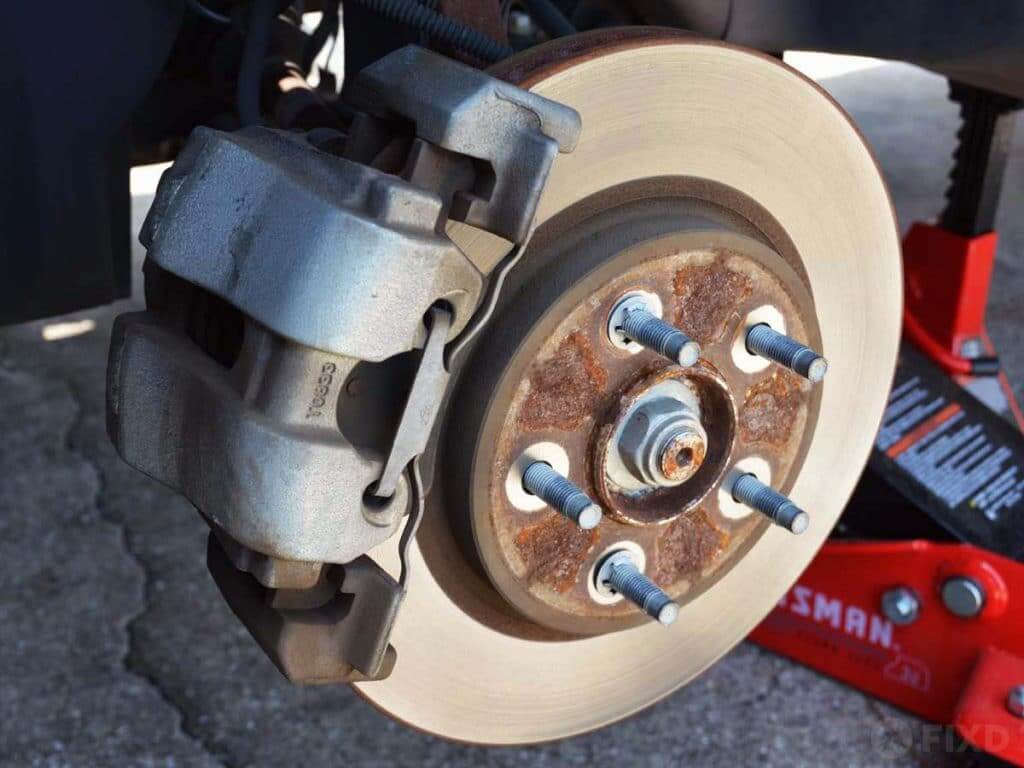
Step 3: Remove and replace rotors, if necessary
If you’re not replacing the brake rotors, you do not have to remove these from the vehicle. If you do need to replace the brake rotors, removal is generally easy. Some automakers use screws to attach the rotors to the axle hub, but most rotors are just held in place by the wheel being bolted to the hub. If the rotors have never been taken off, there can be metal clips around the wheel studs holding the rotors in place. Even when these are removed, it is still sometimes necessary to hit the backside of the rotor with a hammer to loosen rust that is holding the rotor in place. If this happens, try to clean any rust from the axle hub before reinstalling the rotor.
If you’re in doubt of whether you should replace the brake rotors, you can remove them and have them measured at an auto parts store. Grooves or any other damage to the rotor’s braking surface is an obvious sign that the rotors should be replaced.
Step 4: Clean and lubricate brake pad slides

The brake pads and calipers are designed to slide back and forth on their mounts. After removing the pads, you need to clean the brake pad slide area with sandpaper to ensure a smooth surface. In some worst-case scenarios, this area will have deep wear that can cause brake pads to hang up; in this situation, the caliper mounting bracket might need to be replaced. New or old, you’ll want to add brake lubricant to the slides before reinstalling the pads and calipers.

Step 5: Reinstall brake calipers
Reattach the brake pads to the calipers, and then reinstall the calipers. Apply some of the brake lubricant used for the brake pad slides to the caliper slide pins.
Step 6: Reinstall wheels and tires, and lower vehicle
Step 7: Press brake pedal and check brake fluid, top off if necessary

Before attempting to drive the vehicle, press on the brake pedal multiple times until you feel solid pressure. This reapplies caliper piston pressure to the brake pads. Failing to do this before driving the vehicle can result in lack of momentary lack of brake pressure, which could lead to a collision.
Pressing the brake pedal also redistributes brake fluid in the system. Once you’ve done this, open the hood and check the fluid level in the brake fluid reservoir, and then fill as required.
Pro Tip: Most vehicles use Dot 3 brake fluid, but check your owner’s manual to verify the type of brake fluid your vehicle requires.
Claim Your Custom Maintenance Schedule
Get the FIXD Sensor and free app today for a custom maintenance schedule based on your make, model, and mileage. Never miss important maintenance again with automated maintenance alerts! Learn more at fixd.com.
Other Common Car Repair Costs Transmission service cost AC recharge Brake pads and rotors cost Spark plugs cost Timing chain

Lifelong automotive enthusiast with a soft spot for offroading. Wrencher turned writer, but I still love to tinker on just about anything with an engine. Dream car: tie between a ‘71 Hemi ‘Cuda and a ’91 GMC Syclone. #GirlDad #SaveTheManuals